Description
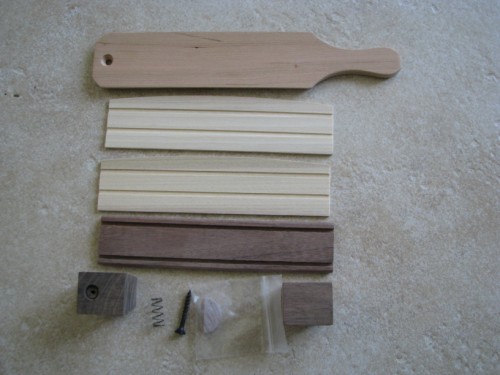
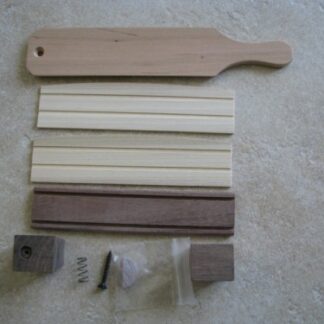
Turkey box call kit. Absolutely, our most popular turkey box call ever is in a ready to assemble kit. This turkey box call kit is widely purchased by individuals, youth groups, FFA classes, state wildlife agents, and others using them for gifts, fundraisers, and educational programs.
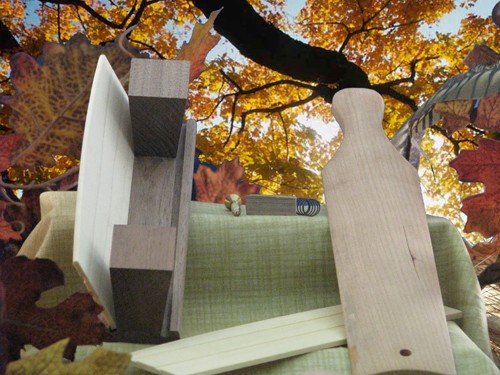
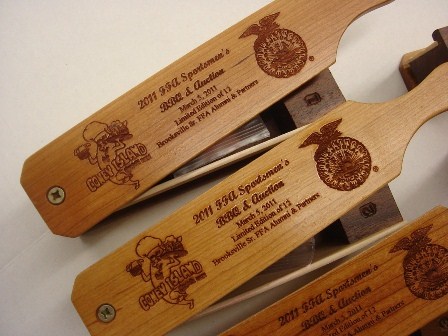
You will be able to glue it, chalk the lid, assemble the call and talk turkey in no time at all. Leave it natural for a very inexpensive box call, or be as creative as you wish. Varnish, paint, write on it, wood burn designs, hand carve, or decorate it as you choose. All the pieces are cut out sanded and ready to assemble.
If you’re a do-it-yourselfer or enjoy woodworking, here’s the opportunity to build your own 7″ turkey box call, similar to our Sweet Water Call. Simple in design and it’s so easy to assemble!
This call makes a great father and son project, a youth group project, or a unique handcrafted gift.
The calls have a walnut base and popular sides. Choose either a cherry or walnut paddle. Make paddle selection using the drop down box below. If you want to combine both cherry and walnut make one selection add to shopping cart and return to add the next selection.
Assembly Instructions For the Sweet Water Turkey Box Call Kit.
Glue the two mounting blocks on each end clamp and let dry, then glue the two sides (Sounding Boards) on with wood glue, and clamp until dry. Just a thin coat on both sides of the mounting block ends and a small drop in a couple spots along the grooved slots is all you will need, just enough to secure the sides so they won’t rattle. Excess glue is very difficult to clean out if it oozes out of the grooves. Wipe off excess glue before it dries, and if you plan to stain after assembly use a wet towel to be sure all glue is removed before it dries. Use a wet towel wrapped around the end of a flat head screw driver to clean excess glue out to the inside edges and grooved slots. Once wood glue penetrates the surface and dries it will not take stain, thus you will be able to see where the glue was left behind in the final finish.
If a pilot hole is not already drilled, a pilot hole will need to be drilled for the screw to hold the paddle. This is so you don’t crack the mounting blocks. Measure the backset to the center of the hole in the paddle, it should be ½” then center that distance from side to side on the end blocks and mark the center. Use a punch to make a small dent so the drill bits do not wander. Start with a 3/8” bit and drill down only 1/8” This is where the spring will sit. Take a 1/8” bit and drill straight down ¾” this is the screw pilot hole. Recommend doing this on a drill press and using flat bottom pilot end wood bits, if available. Use a square end screw driver and hand tighten only. Before screwing the paddle insert the spring in the kit, it goes under the paddle. When the paddle is adjusted properly it will float on top of the spring and sit level balanced across the arches of the sounding boards.
After the call is finished and ready to tune, use the small half round section of chalk from the kit and rub on the bare wood contact surface on the bottom of the paddle. Add more chalk and lightly sand the tops of the sounding board to roughen them up until you reach the level of turkey talk that you are looking for. If you need more chalk use the type the kids use on the driveways, (Brown is the best color). Don’t use chalk board chalk as some of it may contain wax.
Engrave, Stain and finish as you wish, having it disassembled does allow you to stain the walnut, then leave the popular sides natural or vice versa. Most just finish it with a clear vanish or lacquer, as with all wood finishing a light sanding or steel wool between coats, then blowing off the dust followed by a tack rag, will give you a professional smooth finish.
Again you will want to end up with the bottom of the paddle contact surface unfinished and the tops of the side sounding boards where the paddle makes contact unfinished. This can be accomplished by masking those areas off, or trying to stay with a very light coat around these areas and then sand back to bare wood.

Reviews
There are no reviews yet.